
Using Dexpan to Create Opening in Vertical Concrete Wall

Create an Opening in Concrete Wall with Dexpan
Thank you Michael and Nina for sharing your story and all the pictures below.
BACKGROUND
”My wife and I bought a house in Montreal, Canada in the fall of 2019. It was built 60+ years ago, and an extension was added 40+years ago.
One of the reasons we had a great deal was a slight caveat.... The 2 basement sections did not have a connecting opening between them. The added basement must be accessed from outside....
CHALLENGES
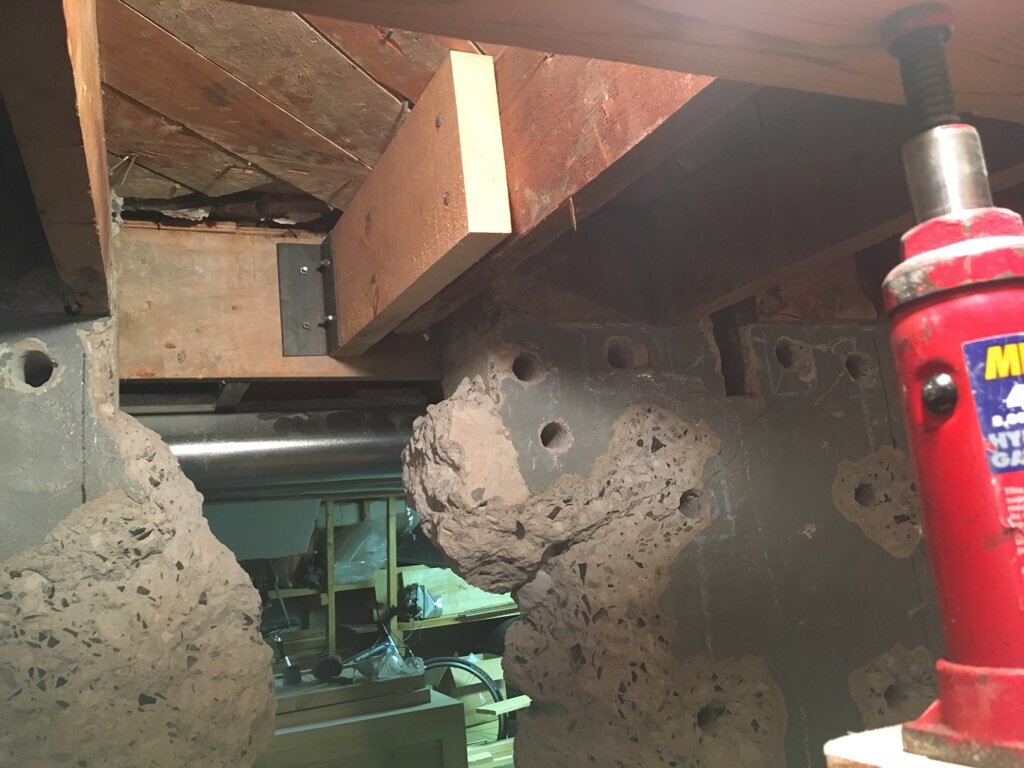
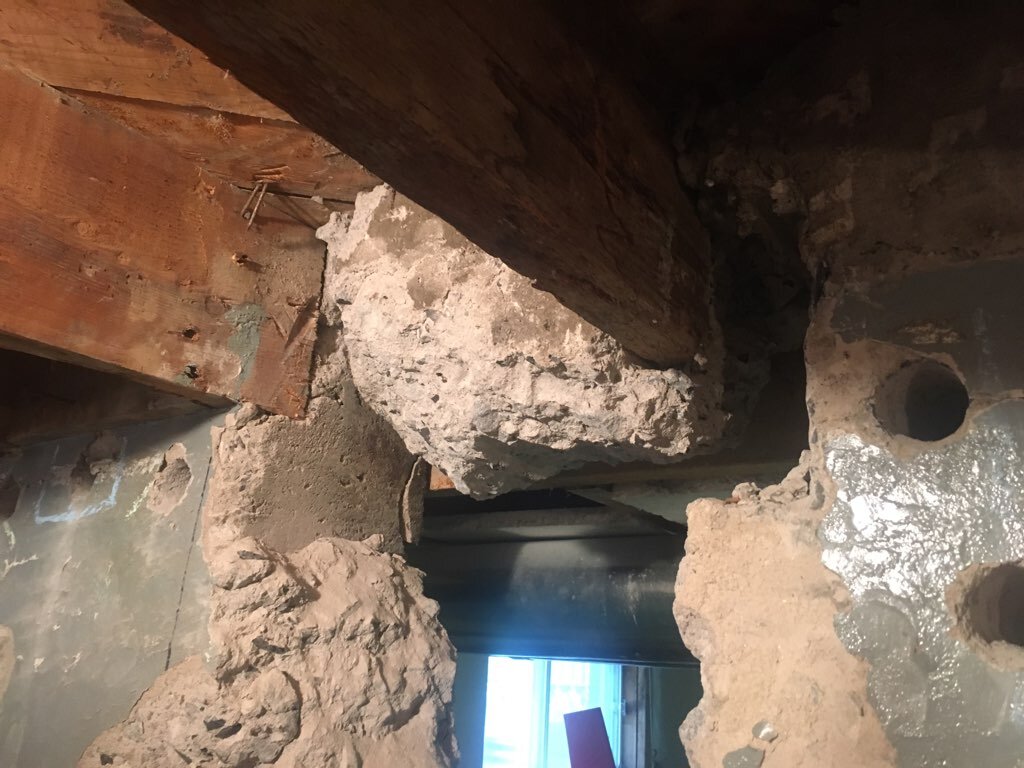
Not a single contractor wanted the job, at any price. Among many issues, the 2"x8" floor joists were cast in the cement foundation, common for the generation that it was built in. Limitation for tools, well, it is indoors so no gas tools could be used. Also, being an occupied residence, dust and saw water coolant handling are critical.
PLANNING
Initial research left us with an electric saw (one only, Husqvarna), with the water used for cooling being a major problem. As luck would have it, a construction buddy suggested Dexpan...
More research followed, along with a call to Shawn at Dexpan. An excellent plan was developed, avoiding much dust and all water handling. [see below]
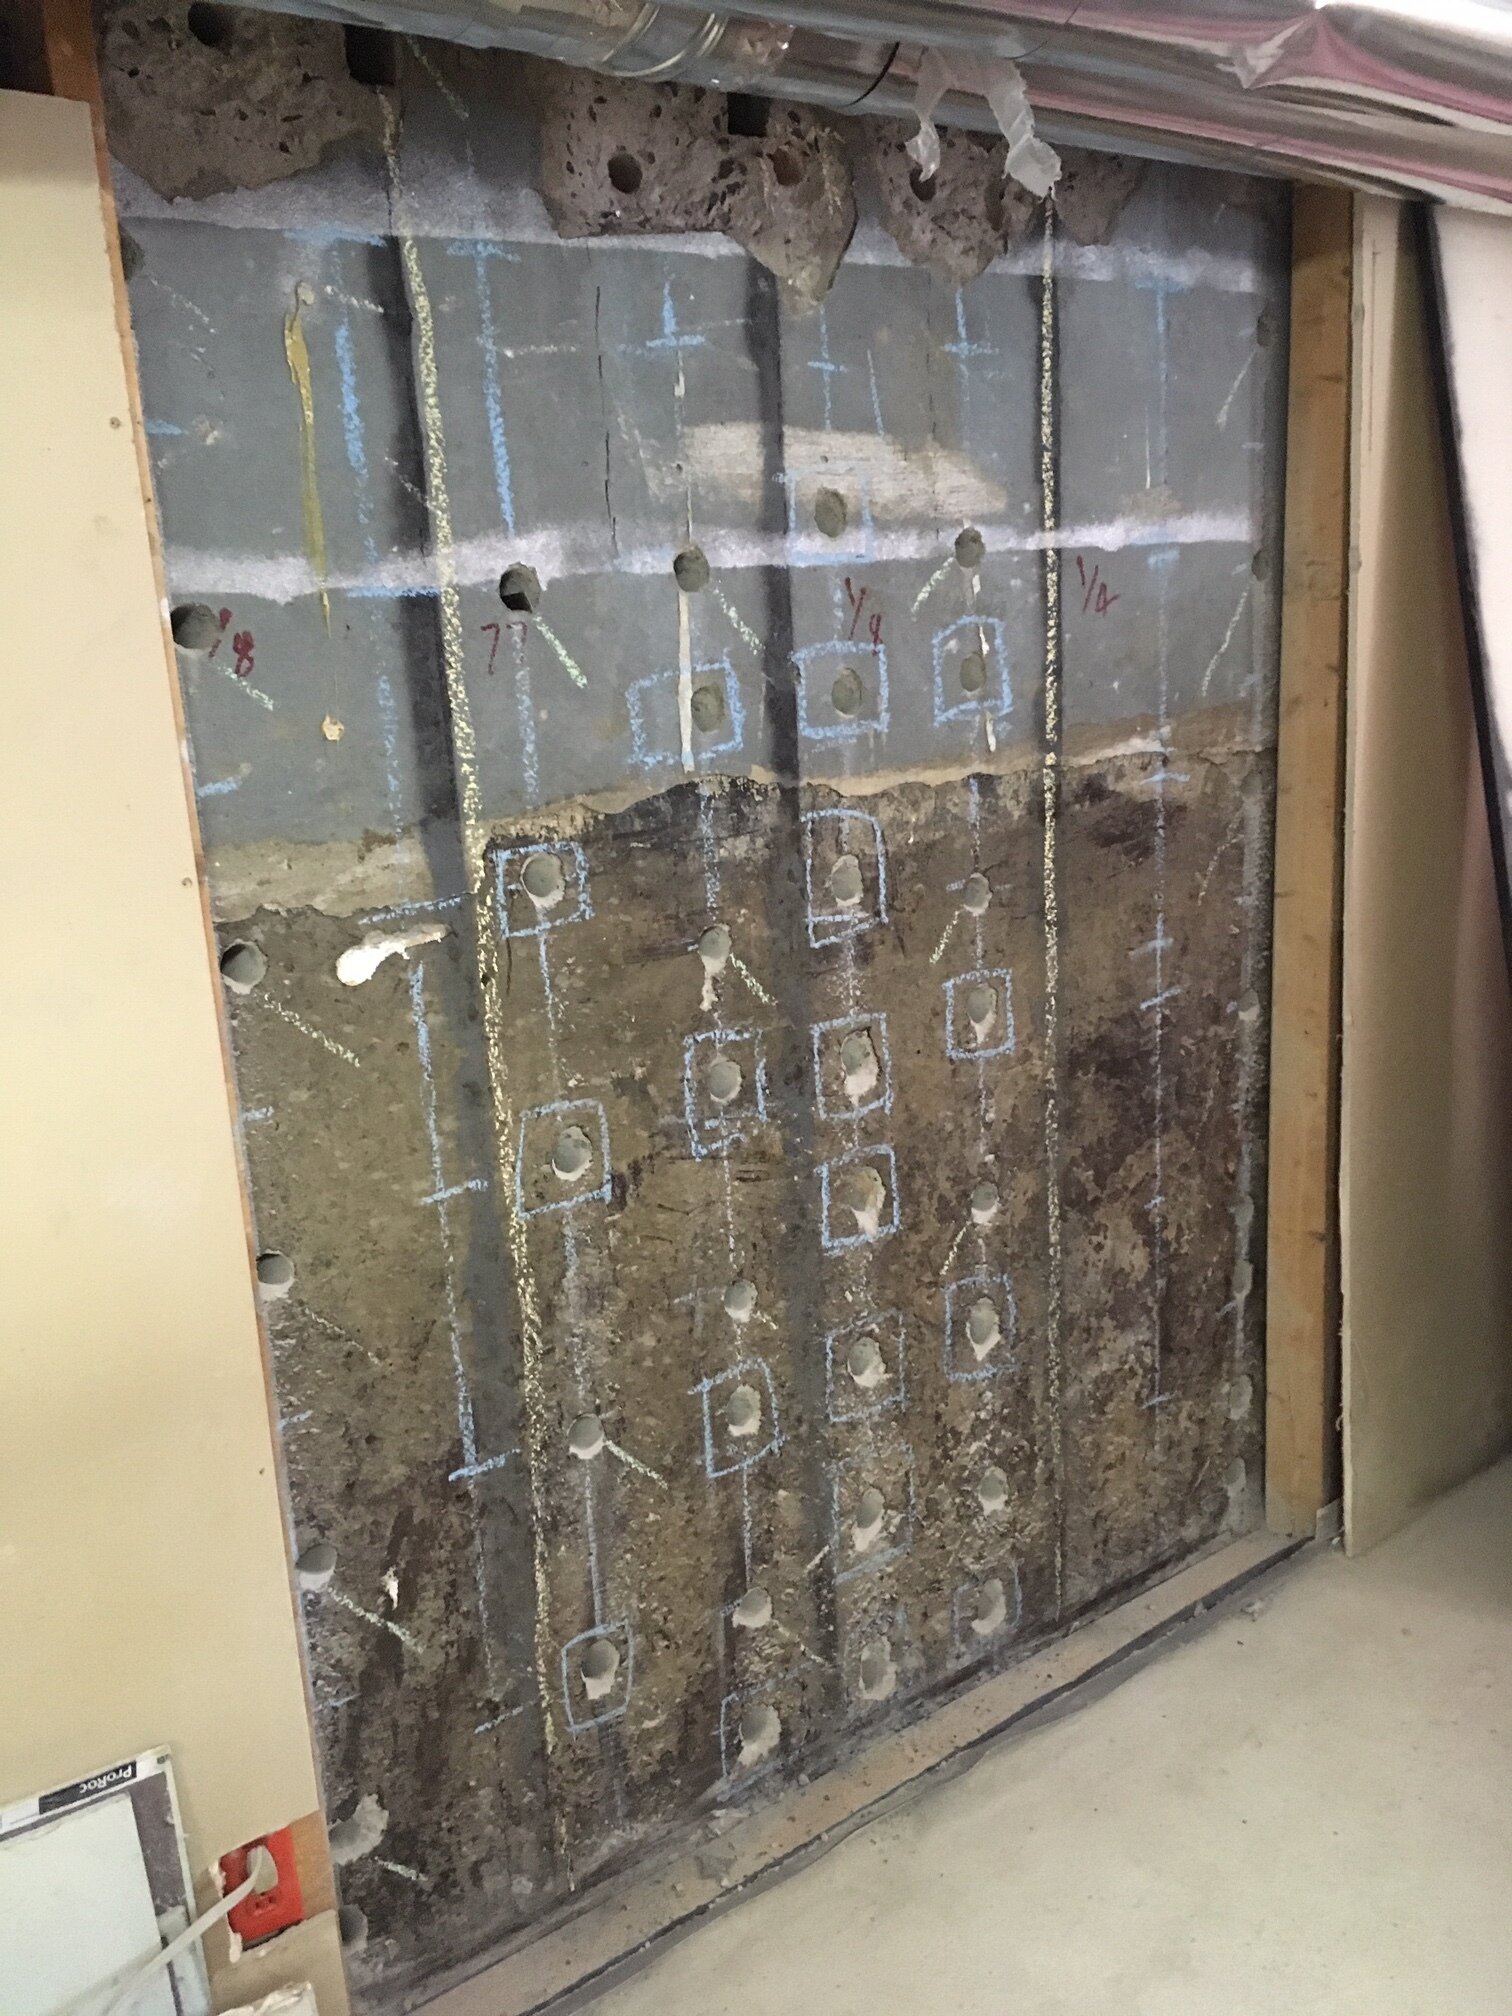
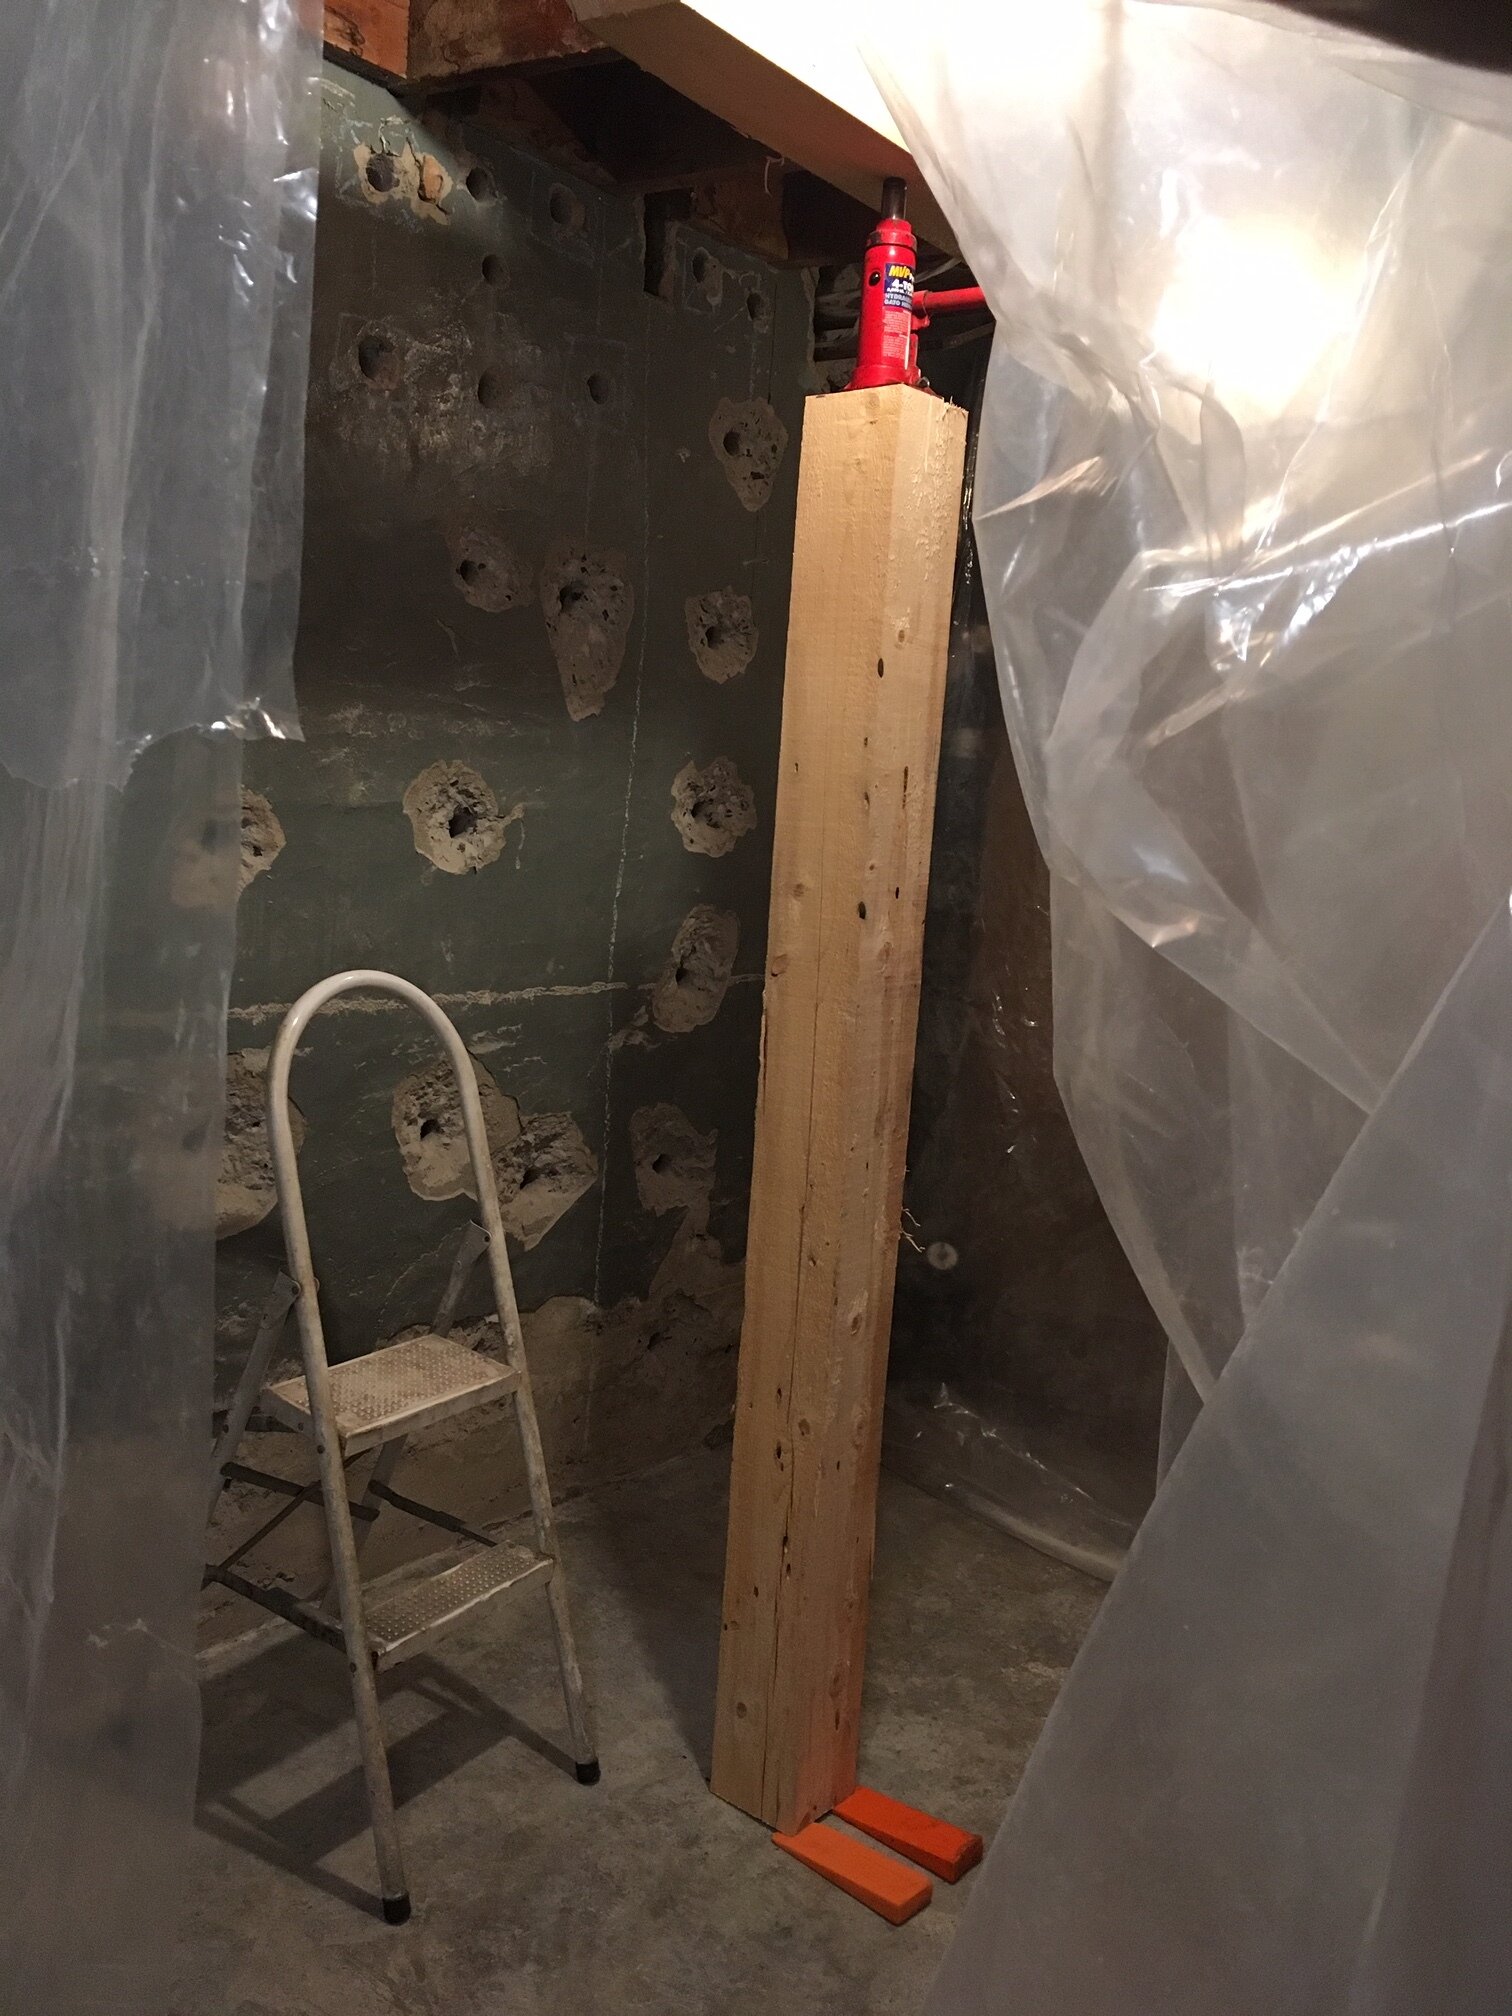
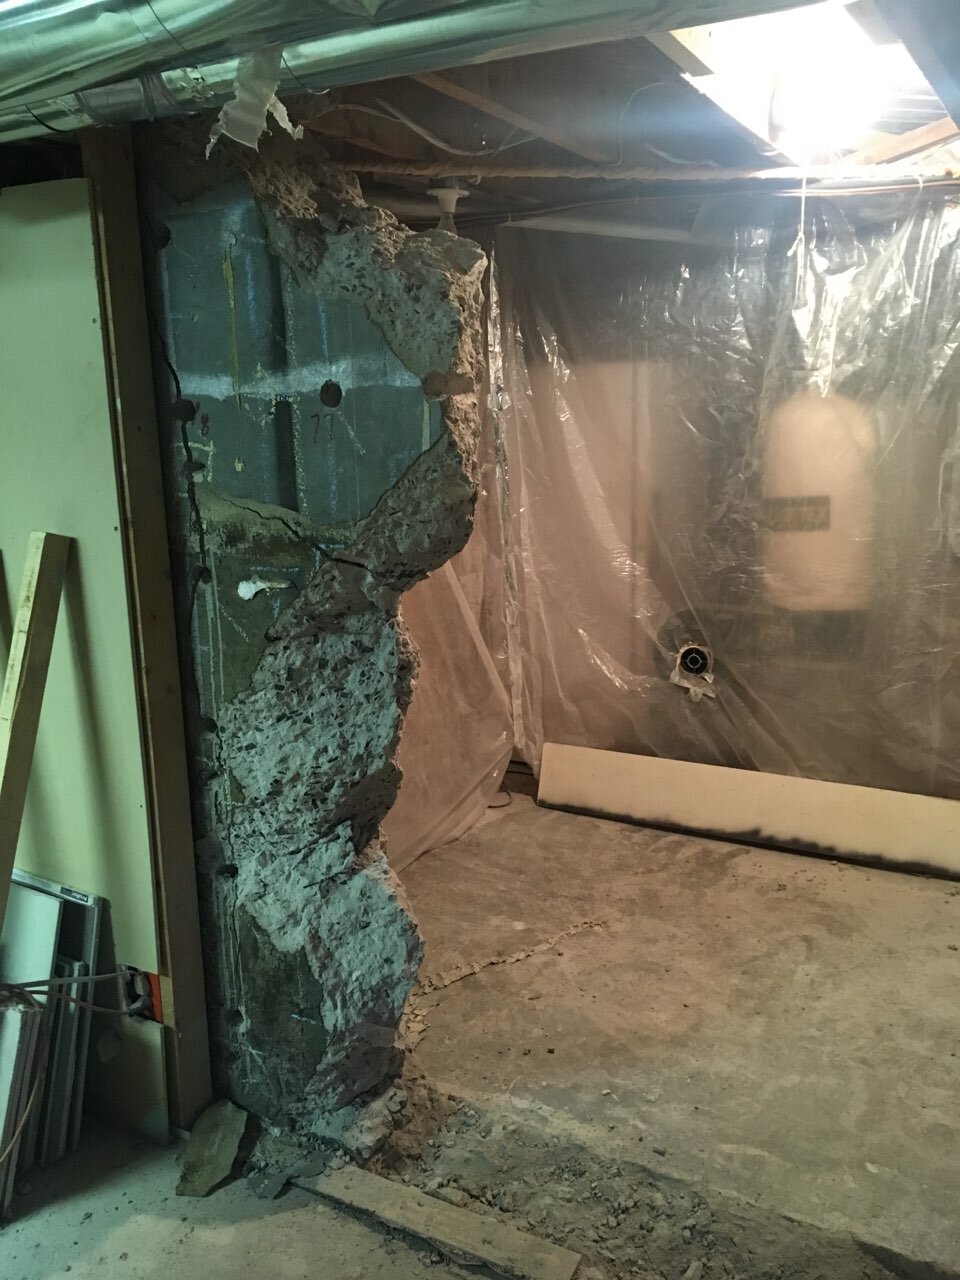
The opening is extra wide at 60", and 76" high x 9 1/2" thick, about 2800Lbs of material to remove. 5 floor joists needed temporary support while cement is removed, to be done in 3 steps to make execution easier.
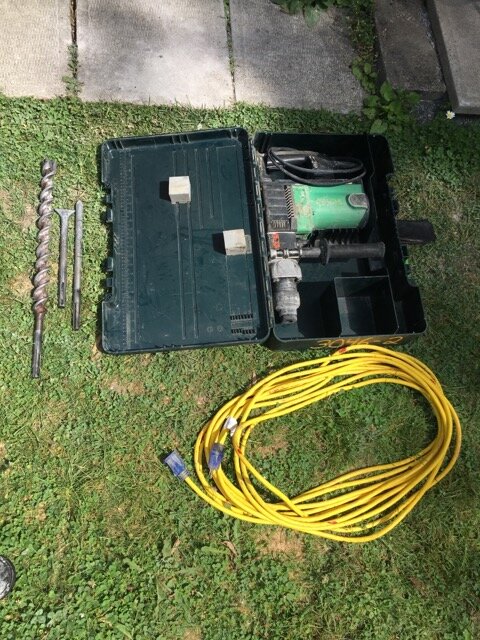
Bought Dexpan and rented drill equipment from Outils Dépôt who we highly recommend.
EXECUTION
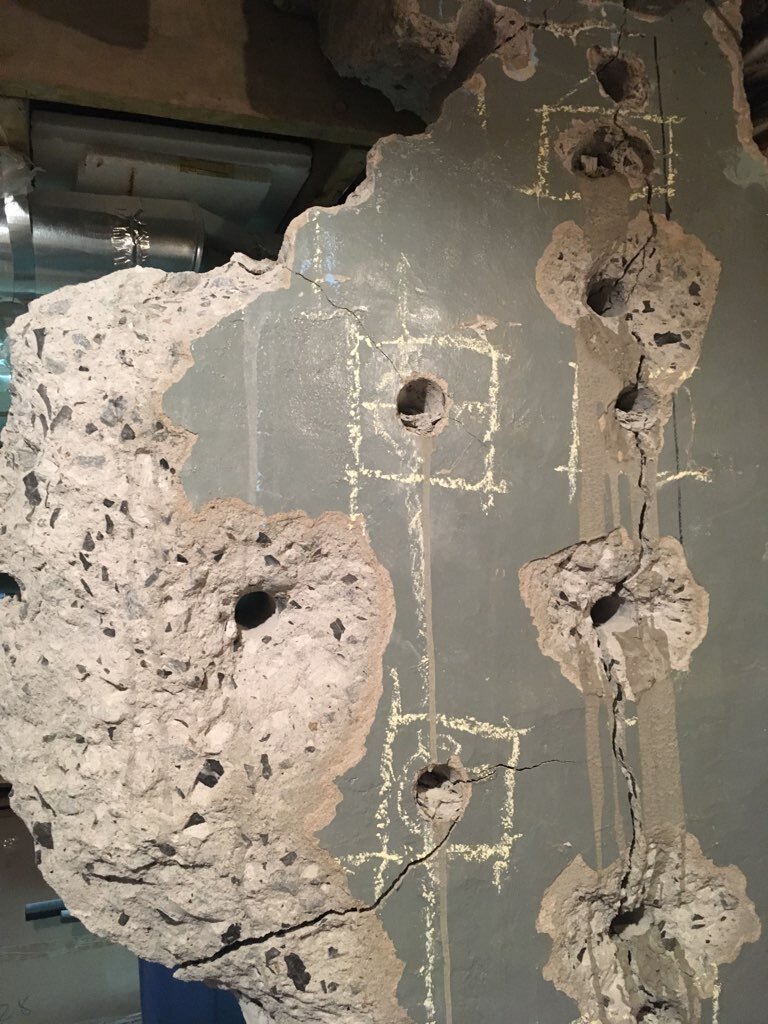
The first of ultimately 80 x 1 1/2" holes were drilled, with the center section to be removed first. The Grout holes were at 90% of depth, down 30 degrees. Spacing 8" apart in centre, 6" apart along perimeter. In goes the grout...
RESULTS
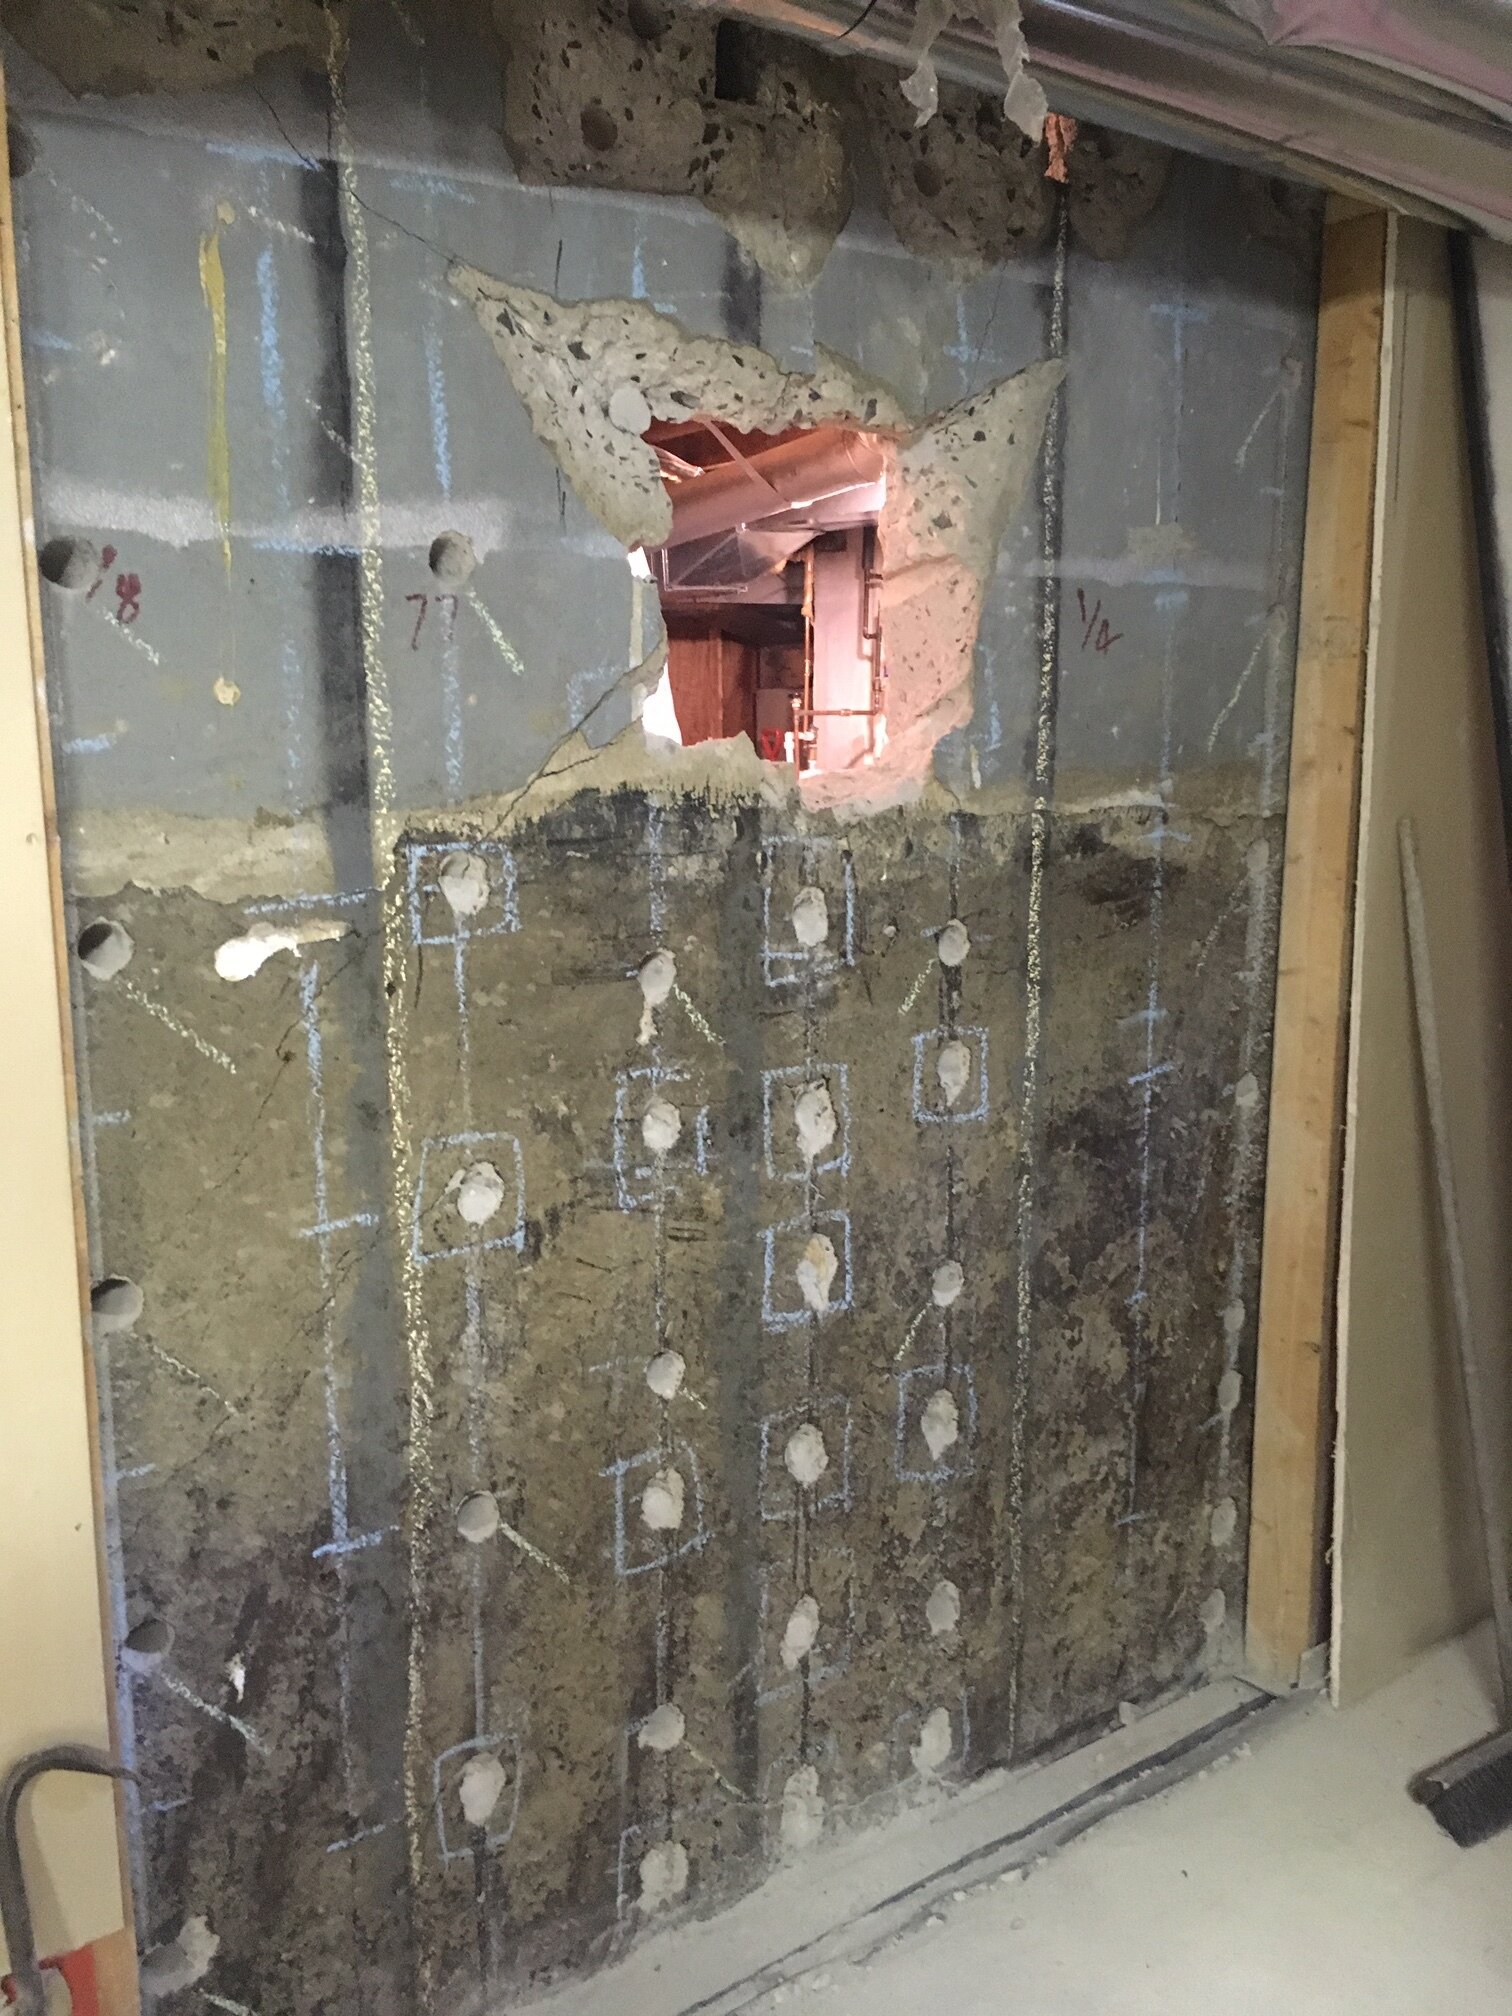
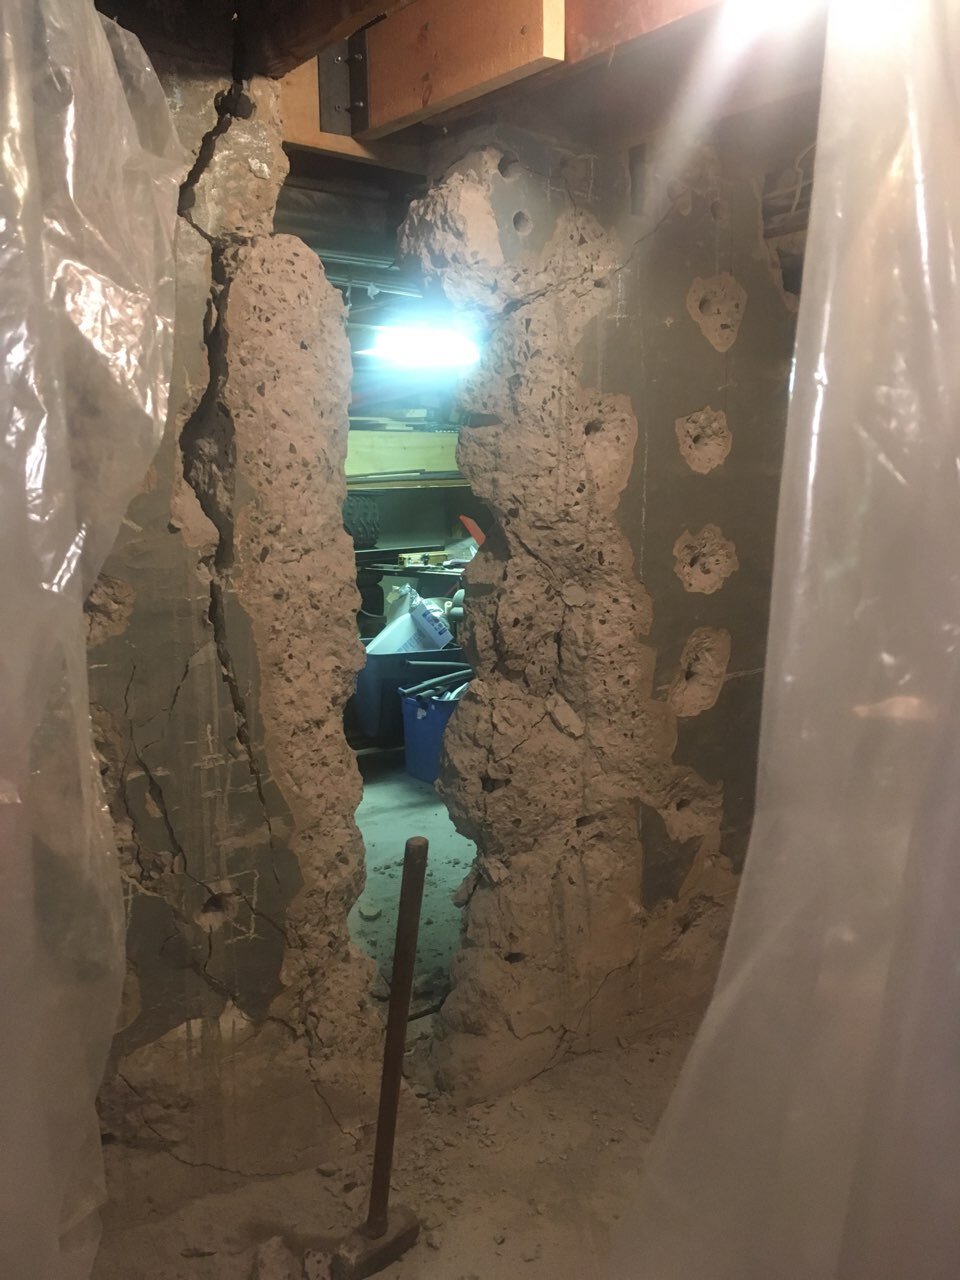
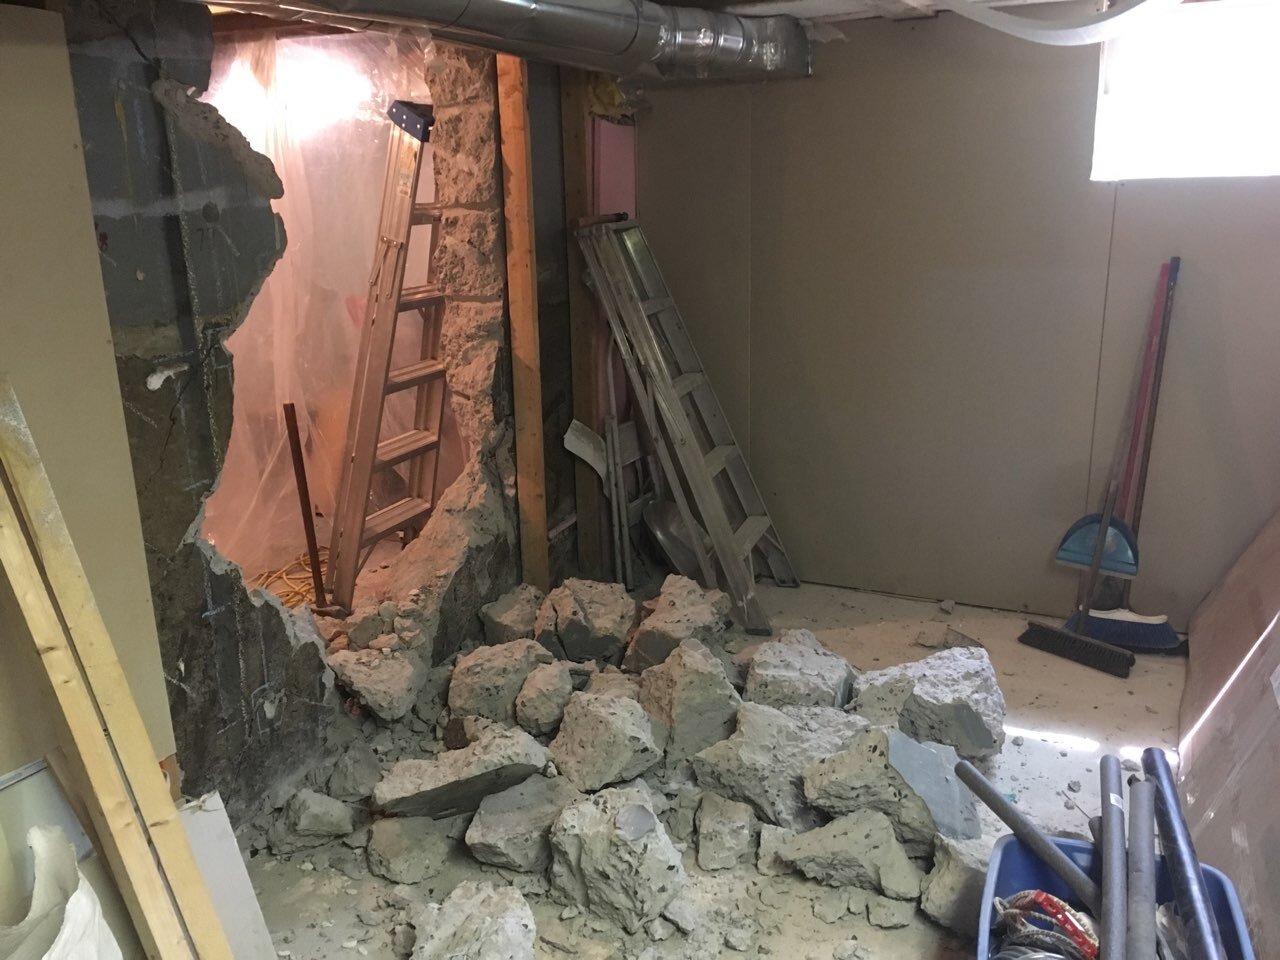
No quite according to plan. The initial slab was projected outward 2 1/2", about 4" thick and 5 feet high, with some cracking in the surrounding material. I figure the grout holes should have been alternated from both sides, since I had access. Sledgehammered and jackhammered balance to create a breach in centre.
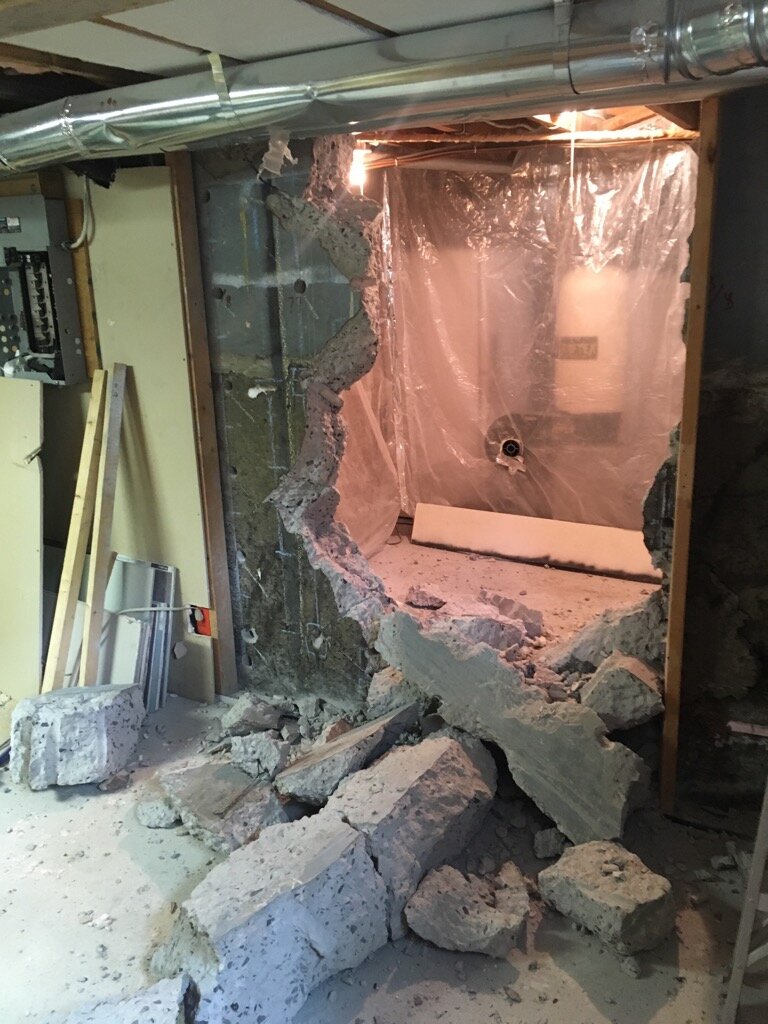
Phase 2 was done with same pattern, but grout holes were from both sides. Very clean break on left side of opening, albeit with very large blocks to 'soften' with jackhammer... Job now 2/3 done.
Each phase was followed by structurally securing floor joists to existing 2" x 10" from addition structure.
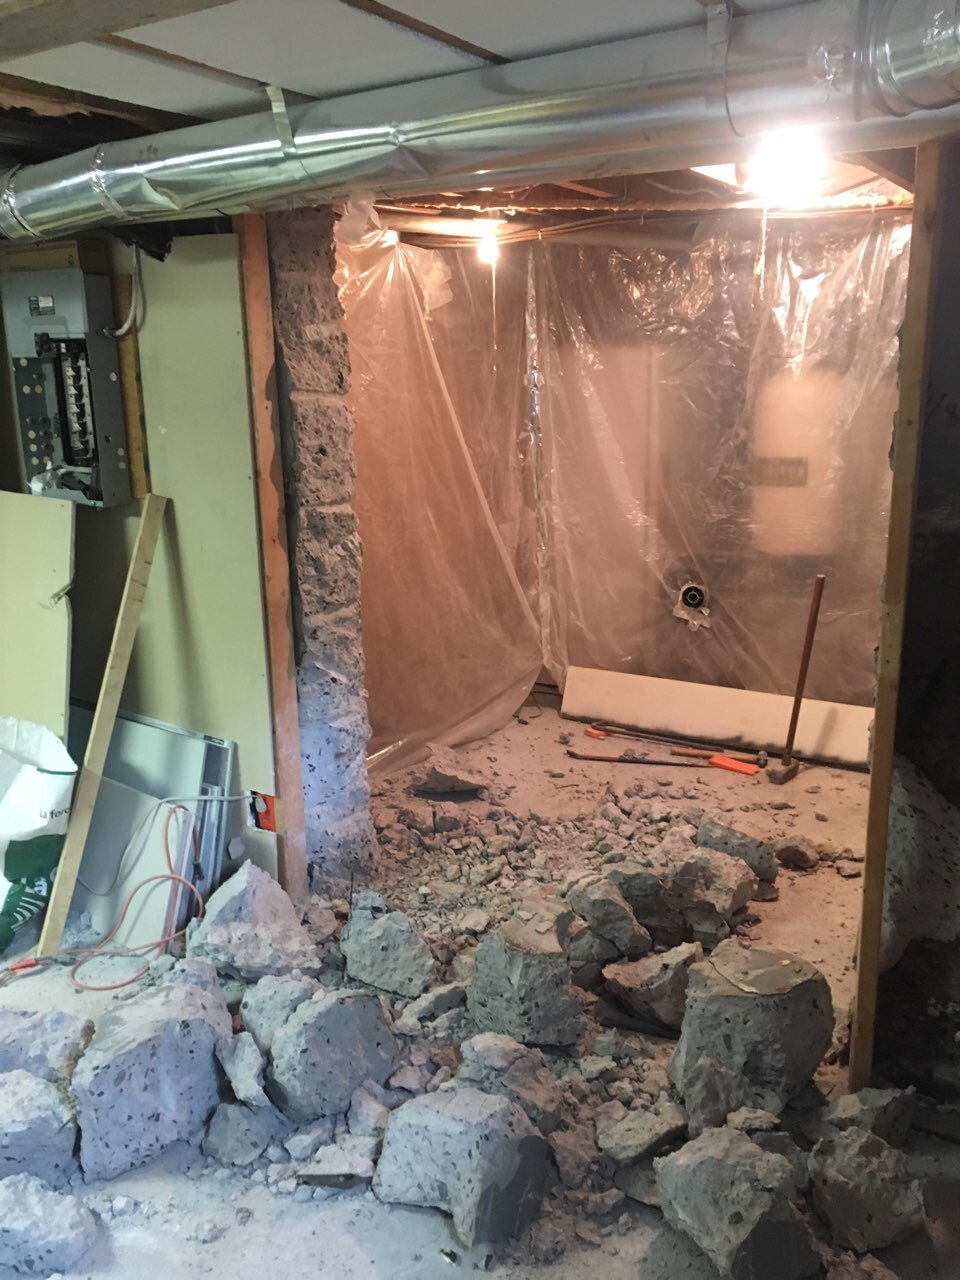
Phase 3 now becoming quite easy, with new found experience all the while sharing the 'joy' with Shawn at Dexpan... Many ideas were sent back and forth.
CONCLUSION
Would I do it again? Of course not....
But, if I did need to do such a thing again, then yes, Dexpan for the following reasons...
1. Absolutely excellent technical support. We went from zero knowledge in cement busting to accomplishing a major job, one that even the 'professionals' did not want.
2. No water management (read 'mess') that comes with using a cement saw. No gas fumes either.
3. Relative cheap rental of a 25Lbs demolition drill.
Pretty hard to beat. Our property value just went up a notch... and the shop does not require boots in winter. All done, 2 weeks start to finish. I already have a lot of interest from friends and neighbours about Dexpan. I gave them your number, Shawn”
TECHNICAL SUPPORT PROVIDED
PROJECT
Concrete Wall Doorway
Dimensions: 7' x 5' x 9-1/2"
Material: concrete
DRILLING HOLES
Perimeter Holes
6-8" apart for higher probability of straighter, cleaner cracking
Alternate relief holes (empty, un-filled holes) and filled holes (Dexpan)
Ensure top right and left corner holes are relief holes (empty, un-filled)
Interior Demolition Holes
10" apart
Utilize relief holes to:
- provide expansion space
- reduce amount of Dexpan required (less volume, less cost)
- ensure relief holes are not side by side
Drill Pattern
Here is a quick sketch, not to scale to show you the concepts of:
- creating a doorway in a vertical wall
- use of Dexpan filled holes
- use of relief holes

KEYS TO SUCCESS
1. Conduct a trial in part of the structure to test how hole spacing affects results you want to achieve.
Spacing holes closer together:
a) straighter lines
b) smaller pieces
c) faster, more extensive cracking
d) trade-off: more drilling
e) trade-off: higher consumption of Dexpan
2. ensure drilled holes:
a) do not intersect with each other or rebar
b) run parallel to the adjoining hole (so pressure generated can work most effectively with adjoining hole)
c) Dexpan filled holes are drilled to 90-95% of wall thickness (not all the way through)
d) Dexpan filled holes are drilled at a downward angle to ease filling of the holes
e) relief holes can and should be drilled entirely through the wall
3. ensure:
a) holes not too dusty and definitely dry before adding Dexpan
b) correct type of Dexpan is used based on concrete temperature (not ambient air temperature)
c) correct quantity of water/Dexpan added together
d) slurry fully mixed
e) Dexpan mixture poured promptly into the holes (within 5-10 minutes of mixing)
4. holes filled in correct order, sequence
5. fill holes early in day, allow gradual warming of day to support the reaction (don't fill at end of afternoon when temperature will drop overnight)
6. protect poured holes from rain (before/after pouring)
7. Patience - Time
- allow 24 to 48 hours after filling holes for fuller expansion and wider cracks .
- Warm conditions speed process. Reinforcing, cooler temperatures can slow the cracking process.
More Customer Stories HERE.


More Customer Stories LINK